Mini Rainbow Quilt

Finished size: 12½ x 9½in (31.75 x 24cm)
Quilting is a lovely way to escape from the day and take a little tranquil downtime for yourself. This mini quilt can be hung in your window as a fun alternative to a painted rainbow (thank you NHS staff and key workers!): simply pop the quilt on a skirt hanger to make hanging it up quick and easy! It could also be used as a dolly quilt for a small person to play with, used as a table topper with a vase of flowers on top or used as a coaster, as there is plenty of room for your coffee mug and a sweet treat!
I have used thicker thread than usual for hand-quilting. Quilting doesn’t always need to involve fine thread and small stitches - trading up and using thicker thread and a bigger needle makes the quilting faster, and gives a lovely bold look to the project.
Fabric required:
- Front/top fabric: white cotton or cotton/linen mix, 12½ x 9½in (31.75 x 24cm)
- Backing fabric: white cotton, 15 x 12in (38 x 30.5cm)
- Wadding/batting: 15 x 12in (38 x 30.5cm)
- Binding fabric: colourful patterned cotton, two strips, 2½ x 12in (6.5 x 30.5cm) and two strips, 2½ x 15in (6.5 x 38cm)
Notions:
- Card, paper, a pen and a round object with a 3-in (7.5-cm) radius for making the wave template
- HeraTM marker, chalk or erasable fabric pen for marking your fabric
- Quilting needle (you have a few options): a size 6 quilting needle, a size 6 embroidery needle, a size 22 chenille needle or a Sashiko needle will all do
- Quilting thread: Aurifil no.12 or Cotton Perle no.12 in the rainbow colours, plus a neutral shade for the other waves; I used a variegated neutral quilting thread, so the colour comes and goes, adding some texture and interest
- Tacking/basting thread (or quilter’s safety pins or repositionable fabric adhesive, if you prefer)
- Iron
- Sharp scissors
- Sewing machine, or sewing needle and thread for attaching the binding
Making the template:
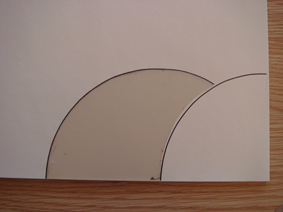
- Draw a circle with a 3in (7.5cm) radius.
- Fold into quarters.
- Place the quarter in the corner of a piece of card, right angles aligned. Draw around the quarter-circle.
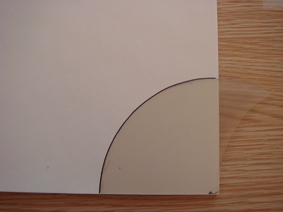
- Unfold the quarter-circle to make a half-circle. Position it so that the central vertical fold is aligned with the left-hand edge of the drawn quarter-circle. Draw up around the half-circle from the bottom edge until you meet the curve of your drawn quarter-circle. You now have your wave shape for the template – cut it out and store it for use later.
Making the quilt:
- Place the backing fabric right side down and lay the wadding/batting on top. Place the front/top fabric right side up, central to the backing and wadding/batting.
- Tack/baste the layers together to stop them from shifting about as you sew: either use rows of long running stitches spaced about 3in (7.5cm) apart, or use quilter’s pins or spray adhesive if you prefer. Also tack/baste the layers together around the outside edge ¼in (5mm) from the raw edge of the front/top to keep the layers neat and secure as you quilt.
- Mark the waves on your quilt top – you may want to use chalk or an erasable fabric pen if you have one; I use a HeraTM marker, which makes a dent or crease in the fabric. Starting in the bottom right-hand corner, work to the left across the long side of the fabric, marking waves until you run out of fabric (if you are left-handed, work across to the right from the bottom left-hand corner instead).
- Now move the template up to make a second row, marking in the same way. Continue until the quilt top is full (refer to the finished image for placement).
- Work out which wave (or waves) you want to be rainbow-coloured and which you want to be neutral.
For neutral curves, quilt the outside curve first. Quilt the next curve in and subsequent smaller curves at ½in (1.25cm) intervals.
Quilt your rainbow waves more densely, again starting from the outside and working in – I quilted three rows of each colour, but when I got to the purple thread I carried on stitching to fill the wave.

- Once all the waves are quilted, remove the tacking/basting stitches, then trim the backing and wadding/batting to square up the sides in line with the quilt top.
- Fold your four binding strips in half lengthways, wrong sides together, and press.
- Use the strips to bind the quilt edges, starting with the short sides first. Place a folded short strip centrally on one of the short sides, right sides facing, aligning the raw edges. Sew along the edge of the quilt top, taking a ¼in (5mm) seam allowance. Repeat on the other short side of the quilt. Carefully trim away the excess fabric at each end of each strip. Fold the strips back and press.
- Place a folded long strip centrally on one of the long sides, right sides facing, aligning the raw edges. Stitch the binding down starting at the pressed edge of the previous binding strip, and continuing to the pressed strip at the other end. Sew along the quilt top edge, taking a ¼in (5mm) seam allowance. Repeat on the other long side of the quilt. Fold this fabric around the quilt edges to create neat, square corners, before pressing and securing with slip stitch.
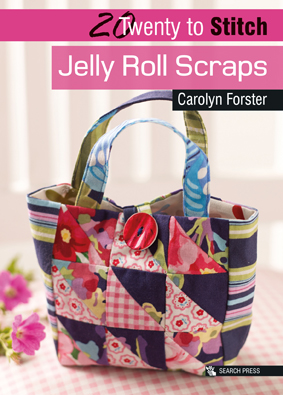
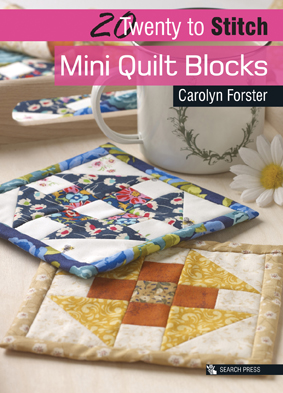
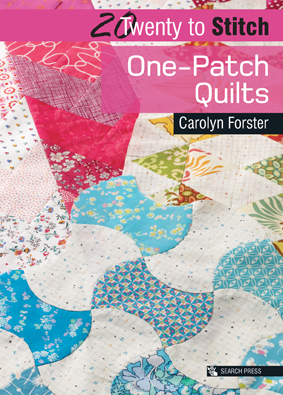
Carolyn's books Twenty to Stitch: Jelly Roll Scraps, Mini Quilt Blocks & One-Patch Quilts are available to purchase from our website.